Wednesday 19 August 2015

Alternative to Glue

Frit

Yes, clear fine frit can be a risk free alternative to glue.  Glue is to keep things in place while moving to the kiln.  Fine to medium grit can do that too.

Glass is pretty heavy and if you move the piece carefully the frit will not move and its weight will keep the other glass pieces in position.  It is better, of course, if you can build in the kiln.  Then you add the frit at the last moment to keep everything in place during the firing.  At rounded tack fuse the clear glass frit will become part of the surface. 

This method will not work for everything.  If you are using laminating or only softened edges for your tack fusing, the glass frit will remain granular.  If you have to tip or manipulate your shelf into your kiln, this will not work either.

This note indicates the use of frit to stablise stringers and rods.


Using frit to stabilise your pieces is yet another way of reducing the amount of glue usage in your work and so reduce the risk of bubbles and marks, even though the practice is not always applicable.

Wednesday 12 August 2015

Glass Snagging on Grinder Surface

A number of people report difficulties in sliding the glass along the surface grid.  The glass catches on the grid squares and so does not move easily and smoothly when grinding.
 
homepages.nildram.co.uk


Some suggest sanding the grid to remove any rough places.  The difficulty with sanding the grid is that it will mean that you have to replace the grid before the grinder comes to the end of its life.  Whether you will be able to replace the grid is a risk you have to take if you do this.

It is better to give all sides of your glass a quick arris before beginning to grind. Although technically, an arris is the edge of a piece, it has come to mean the modification of the edge in glass work.

www.pavingxpert.com

 An arris on the glass edges can be made by hand with a pass of a grinding stone on the top and bottom edges.  

www.delphiglass.com

It can also be done by a light pass of the glass along the grinding head. This arris protects your fingers too, as it removes the sharp edges of the glass.

www.ameriglasco.com

Make sure any points on the glass are slightly rounded, as they are most likely to get stuck in the grid.  You can nip the point with your grozers, or give a slight rounding of the point when making the arris.

It is important that you do not press down on the piece of glass. Press horizontally toward the grinder bit instead. The top is plastic and so deforms pretty easily.  With long pieces the bowing of the top means that the glass, which does not bow, will catch on the grid.  So, to keep the surface grid flat, hold long pieces at the ends.  This will remove any tendency to press down in the middle, as any downward pressure will be at the ends of the glass, allowing the grid to remain flat.


Wednesday 5 August 2015

Channels for Jewellery

One way of providing attachments for chains is to make a channel in the piece. This is most often done by placing something between the glass pieces to maintain an opening for the chain to slide through. The materials can range from toothpicks, coated wire, rolled ceramic fibre paper and many other things which will stand up to the heat for the required time.

One of the requirements is to prevent needle points and drawbacks of the glass. There are a number of ways to do this. Some of them are noted here.

One method is to make pattern bars with a channel through the whole width of the bar. Then you need to cut the bar into strips (leaving the channel material in place), do any edge work required, and fire polish.

When creating a single piece from cut glass parts, you need to ensure the upper piece of glass extends beyond the lower piece by at least 3mm to allow the glass to bend over the channel and touch the lower piece. A little more than 3mm will allow the upper glass to curve over the bottom piece and create a rounded top with no evidence of the joining of the two pieces of glass.

Another method is to use two pieces of 2mm glass with full pieces above and below. The narrowest piece of glass will be about 3-4mm and placed at the top of the pendant. The largest piece will be long enough to give a 2mm gap between the two pieces. This is kept open by inserting two pieces of 1mm fibre paper into the gap. Then cap with the top piece of glass. All the glass can be of 2mm thickness, as the three layers will give the desired 6mm thickness.

Finally, a tack fuse firing can help to avoid the needling that can occur at the channel, as the glass is so much thinner than the 6mm required for a full fuse. This means that you can do the work in stages. First fire the elements to the desired state, then combine them for a tack fuse when creating the channel.


If you use a clear middle glass, you can create a depth by having a design on both the bottom and top layers of glass.

Wednesday 29 July 2015

Stabilising Stringers

Stringers and rods never seem to stay where you put them.


  • Glue them and they move after the glue has burned away.  
  • Grinding a flat side to them seems a lot of work.  
  • Easier, is to put them in the kiln and take them to a tack fuse to give a flat spot. But that takes a lot of kiln time.
  • For stringers you can put a kink or curve in it by heating over a candle.  Rods require more heat than that. Of course, this is of no use for straight lines, and takes additional time.


A simple method which can be used with a tiny amount of glue, or not, is to add clear fine frit around the stringers and rods. This is enough to keep them from moving once the glue is gone due to the heat.

Assembled panel by Kathleen Watson with the stringers surrounded with fine clear frit which can be seen as white

The frit should be put on the assembled panel once it has been moved to and placed in the kiln.  Any movement will disturb the frit and defeat the purpose of keeping the stringer or rod in place.


The fired result

This was fused to a rounded tack fuse and no signs of the clear supporting frit is visible.

This is a quick simple method to stabilise rod, stringer and other small items that may shift in the firing.

Wednesday 22 July 2015

Thinning a Melt

There are two basic methods, both use gravity, but one uses additional weight.

Gravity
In this you take advantage of the forces of gravity and the fact that heat reduces the viscosity of glass.  The universal belief is that glass tends towards 6-7mm thick. Yes it does, but only under the times and temperatures we give during fusing.  Those who have seen the results of relay stuck on for hours will know that glass will become thinner than that. A kiln stuck at 1200C for several hours will produce glass that is less than 3mm thick, although stuck to the shelf.

The practical approach is to give the glass plenty of heat work by reducing the usual rate from bubble squeeze to top temperature.  Also increase the top temperature, and give the glass time to flow as it moves slowly.

If your melt is 12mm at the centre and 6mm at the edge you need to take that difference into account when setting the initial rate of advance. A rate of about 90C/hour up to the softening point should be slow enough to avoid thermal shock.  You do not need to hurry from there onwards, because the glass needs to be hot throughout to move easily.  A rate of 200C, or less, per hour would be fast enough.  The top temperature should be set around 810C and for at least half an hour, perhaps an hour depending on the diameter of the piece.  Periodic observation is advisable.  When the reflections seem fairly straight from one edge to the other, it is as flat as it will get using this process.

Anneal for a piece of 12mm, even though the piece is no longer that thickness, because the glass has been through a high temperature process and the compatibility of some of the glasses may be a little less than originally.

Note that this process should be done on a kiln washed shelf.  Thinfire or papyrus will get caught up in the moving glass.  The coarser fibre papers will inhibit the flow of the glass.  You need to expect to do considerable cleaning of the glass afterwards.

Pressing
The other method is to use weight above the glass to thin it more quickly and certainly to the desired thickness.  Place a kiln washed shelf with the kiln wash facing toward the glass.  The weight of the shelf above presses the glass outwards more evenly than a free flow will.

Put solid spacers of the thickness you want the glass to become.  Remember that ceramic fibre used as spacers will thin when the binder has burned away. So, a 6mm stack of ceramic fibre paper will be less than that at the end of the firing.  The larger the pieces of fibre paper you can use, the less the effect will be, as the weight of the shelf will be distributed over a wider area. 

The same kind of firing schedule can be used on the way up as in the gravity only method, but you need to approach the annealing differently.  With two shelves and the glass between, you should be thinking of annealing for something in the region of 25mm. 


Do not do this pressing on top of your normal shelf, as the temperature differential between the exposed shelf and the part of the shelf covered with 12mm of glass and 15mm of shelf will be pretty large, leading to thermal shocking of the shelf. 

Wednesday 15 July 2015

Lead Free Solder

Lead free solder is being required for the electronics industry, but not yet for the stained glass industry.  However, some people are beginning to use lead-free solders for other reasons.  In general, it is reported that it is harder to get smooth beads.  Some reasons may relate to the physical properties of the material being used.

Lead free solder solidifies at a higher temperature than the common tin/lead solder compositions although the common lead free solders melt at slightly lower temperatures.  For comparison purposes characteristics of some common lead free solders are given with the common tin/lead solders.

Sn = Tin,   Ag = Silver,   Cu = Copper   Pb = Lead
Solidus = solidification temperature.   Liquidus = Melting temperature

96%Sn, 4%Ag which has a Solidus of 221C and Liquidus of 229C
95%Sn, 5%Ag which has a Solidus of 221C and Liquidus of 254C

Slightly less commons is
96.5%Sn, 3.5%Ag which has a Solidus of 221C and Liquidus of 221C, but has poor wetting properties except on stainless steel.

Other solders are available up to 7% silver, but these are increasingly expensive and have much higher liquidus points.

A truly eutectic lead free solder can be produced with 95.6%Sn, 3.5%Ag, and 0.9Cu, which has a Solidus and Liquidus temperature of 217C

For comparison:
63%Sn, 37%Pb has a has a Solidus of 183C and Liquidus of 183C
60%Sn, 40%Pb has a has a Solidus of 183C and Liquidus of 188C
50%Sn, 50%Pb has a has a Solidus of 183C and Liquidus of 212C
40%Sn, 60%Pb has a has a Solidus of 183C and Liquidus of 238C

The solidus temperature of lead free solders is almost 40C above the tin/lead solders.  This may be the reason people find the need to turn up the heat of their soldering iron when using lead free solders.  The difference in the Liquidus and Solidus points for 4%Ag is very similar to that for 60%Sn/40%Pb.  So with enough heat should behave similarly.


Wednesday 8 July 2015

Physical Characteristics of Solder

Solder is an alloy of various materials.  The most common ones for leading and copper foil work are tin, lead, copper and silver.  The most important is tin.  There are, of course, some solders that do not have tin in their composition.

The most common alloy for us is tin and lead.  Various proportions produce different melting (liquidus) and solidification (solidus) points.  This graph shows the effect of changing the amount of tin in a tin/lead solder.


This shows that 61.9% tin and 38.1% lead produces an eutectic solder (although others report a 63/37 alloy as eutectic).  That is, a solder which has both its liquidus and solidus temperatures the same.  This kind of solder solidifies very quickly after its melting.  If we put a lot more heat into this kind of solder, it takes time to become solid.  During that cooling, the solder bead can become disturbed and become either crystalline or marked.  The objective should be to move quickly enough to melt the solder, but not to dwell, as that adds heat.

For the other common combinations [insert ref to previous blog entry] there is a temperature range where the solder is pasty.  It is neither fully liquid (needed to get a good bead) nor yet solid.  It is in this range that various problems can arise.

Failing to get the solder to the liquidus state will result in what is called a cold joint.  The solder is crystalline at the visible level.  It has visible cracks and will not adhere to the copper foil or lead properly.  If disturbed while the temperature is in the pasty range while cooling from the liquidus state, you will also get a crystalline structure to the solder, resulting in an insecure joint.

The graph also shows the melting points of lead (327.5C) and tin (232C).  The wonder of an alloy is that by combining these two metals, the solidus points are greatly changed. This graph shows is that tin is not fully solid until 13C, while lead is solid immediately below its liquidus point, but by combining them a solidus temperature of 183C is achieved.


This graph, with different temperatures, is applicable to lead free (tin and silver mainly) solders too.  The solidus point is about 40C above that for tin lead solders.

Information on specific solders is given here and here

Wednesday 1 July 2015

Storage of Came

There are a variety of ways of storing lead came.  The best would be storage in air tight containers.  In the absence of that, many solutions are possible.  These are some of the considerations you should be thinking of when constructing your came store.

Straight
You will get the most use from your came if you store it straight.  If you are short of space or don’t have long arms to handle both ends at the same time, you can halve the normal 2 metre lengths. This also makes for shorter storage units.

Container
The surface oxidisation of lead is reduced by keeping it in a container whether box or rainwater pipe for example.  If the ends or top is open, it is a good idea to wrap the came in waxed paper, as that seems to keep the lead better than ordinary paper.
         
Dry
Lead oxidises on the surface quickly in a damp atmosphere. Try to store it in an area that is not subject to condensation.

Ease of extraction
When building your container, think about how easy it will be to extract the lengths of lead, whether by drawing or lifting them out.


The rate of surface oxidisation relates to the purity of the lead.  The more pure the lead the quicker the surface oxidises.  Half hard and hard cames oxidise more slowly.  However it is normal to have to make sure the surface is bright before soldering.  Don’t worry about a bit of oxidisation – it is only the surface and a scrubbing with a brass wire brush at the joints will have the came ready for flux and solder quickly.

Wednesday 24 June 2015

Hand Finishing Jewellery Edges

Often jewellery scale pieces need to have their edges finished before the final wrapping or hanging on the necklace. This is frequently done by running the piece against the grinder, dumping it in water and then cleaning with a tooth brush or similar before the next process.  What is described here can be used on fused and “raw” glass both.


You can finish the edges of pieces by hand. 

Get a flat piece of glass – window glass is good for this.  You can put a fine grit such as 200 onto the glass and wet it to a paste. Place the edge of the jewel on the glass and begin rubbing with moderate pressure in an oval or figure of 8 motion.  You will be surprised at how quickly the edge is refined.  You can follow this up with finer grits.  Make sure you clean the jewel and the grinding plate thoroughly if you use the same glass plate for finer grits.

If you want a less messy - but slightly more expensive - method, use wet and dry sandpapers.  These can be found in grits from 200 to 6000, although you will not need to go beyond 1200 which will give you a smooth, shiny edge. These need to be kept damp too.  If you are planning to fire polish the pieces, you can stop at 400 or 600 grit.

This process avoids the water soak stage, can bring back into use the pieces you forgot to soak, and can be taken all the way to the finished edge.  If you are doing only a few pieces, it is much faster than a fire polish in the kiln.


Tuesday 16 June 2015

Diamonds and Water Use

When drilling glass with diamonds, water has three uses.


It cools the glass.  The action of grinding away the glass surface creates heat.  If this is not dissapated, the glass will break from the heat differentials caused by the drilling.

Water helps to lubricate and clear the grinding dust from between the diamonds on the drill bit.

Water keeps the glass dust that would otherwise be circulated in the air contained and easy to clean. Ground glass does not cause silicosis.  This is from a leading industrial safety expert:

"It is important to understand the difference between glass and crystalline silica because exposure outcomes are extremely different!  Glass is a silicate containing various other ingredients which have been melted and upon cooling form an amorphous, or non-crystalline structure.  While silica (SiO2) is a primary ingredient in the manufacturing of glass, when glass is formed under heat, the crystalline structure is changed to an amorphous structure and is no longer considered crystalline.  Ground glass is rarely respirable because the particle is too big.
Always use wet methods when grinding glass! Water captures the dust."

Source: http://www.gregorieglass.com/Health_Safety_Chemical.html

Wednesday 10 June 2015

How Much Glass to Buy

Of course the answer is that you can never buy too much as you will use it for something later.  Still, economics comes into play sometimes and you need to consider how much glass is enough for a given project.

I find that the larger the pieces in the project, the more glass I need.  There is greater wastage with large pieces than in a project with many small pieces.  I always cut my large pieces first, as this leaves cullet for smaller pieces, thus reducing the wastage.

If you are using glass that has a definite pattern or flow to it, you need to plan on a greater wastage factor than if you are using plain glass or textured glass with no particular direction.

The stage you are at in your cutting will also have an effect on how much glass you need.  At earlier stages you will have more unexpected breaks than later on, so take that into account too.

Some people report that they can manage with one third more area than their project, others one half more.  I find that I usually need twice the area to have enough glass to complete the project.


Wednesday 3 June 2015

Flattening a Distorted Piece

It is sometimes possible to flatten a formed piece to once again fire it in a mould.  A lot depends on the shape of the mould it was first fired in. A mould which requires a lot of stretching or has sharp angles is likely to produce a flattened piece of glass that will have extensive distortion of the pattern or design of the original piece.

A full fuse is not necessary.  The object is to make the shaped piece flat.  That should happen at slumping temperatures and certainly long before a full fuse.  A tack fuse temperature may even be more than required. 

You will need to observe the firing, to ensure that you get the piece flat but do not further distort it. Set the schedule for the temperature you think will do the job. Then add some soak time. Observe with quick peeks from about 50C below your target temperature. This will give you the information you need for this one and future pieces.


When the flattened shape is achieved, advance the controller to the next segment and anneal as before.  When cool, wash and inspect the piece for a clean surface without any imbedded kiln wash or fibre paper.  Consider whether this flat piece still has a desirable design, or is too badly distorted.   It may be that you want to slump the piece even if the design is distorted as a learning experience.  

Wednesday 27 May 2015

Float Glass

A question about sharp raised points on the corners of a square bubble plate made of window glass is the occasion to discuss some characteristics of float glass. 

It is necessary with float to find out which is the tin side and which is the air side. The tin layer of the glass produces a bloom that resembles devitrification when compressed. Put the tin side down for a slump.  If you slump with the tin side up, you will create a tin bloom by compressing the tin. If the tin is on the bottom, you will be stretching the tin and so avoid the tin bloom.

S
harp, pointed and raised corners are the result of devitrification.  Devitrification is the crystallisation of glass. Mild devitrification appears to be dirty streaks across the surface. Extreme devitrification produces a crumbling glass surface. Raised, sharp corners are the result of intermediate devitrification. The tin side does not protect against devitrification.  It does provide a separating action when against the shelf, although kiln wash is still needed.  Float glass devitrifies easily. I have only ever been able to get two firings without devitrification.

Cleaning is of great importance in avoiding devitrification. Clean well with only a little detergent, rinse and then polish dry with paper towels. Any residues left on the surface will promote devitrification.

A general way of reducing sharp corners is to nip or round the corners with diamond pads. I nip the corners - it is quicker and does not leave any microscopic pits for devitrification formation.

Paint, stains and enamels will interact with the tin to produce variants of the colours.  Stains most often become darker than when put on the air side. Powder, frit and mica will not usually react to the tin.


Remember, float glass is not manufactured to be a kiln forming glass.  You will always be at risk of devitrification.

Wednesday 20 May 2015

Firing Quickly

Firing quickly is often our desire, in spite of the mantra of the experienced – slow and low. How to do this safely – without fractures or bubbles – is the requirement.

Firing quickly on smaller things (say, up to 100 mm) is not normally a problem.  Difficulties can arise due to the kind of layup, but usually the mass is not great enough to be thermally shocked, nor the size enough to trap air that would cause bubbles.

Firing quickly for larger pieces is where difficulties arise. These relate to the initial rate of advance to the softening point, the bubble squeeze, advance to top temperature, and annealing.

Advance to softening point
The first place this occurs is to the upper strain or softening point.  This is the range where the glass is solid and does not transmit heat well, leading to the risk of thermal shock.  You need to find a rate of advance that is a little slower than that which would cause the glass to break.  My guidance is to use no more than three times the annealing rate for the glass of that thickness to reach the softening point.  This temperature is approximately 40C above the annealing point. The glass is certainly plastic above that temperature, so the rate of advance can be faster.

Bubble squeeze
Strategies from the softening point to bubble squeeze vary.  You can go quickly, say 1.5 times the previous rate of advance, to the bubble squeeze heat soak of around 30 minutes.  The other is to go quickly to 50C below that temperature and advance at 50C per hour to the bubble squeeze heat soak.  This is often used on more complex and thicker lay ups. There are numerous variations upon these two strategies depending on the circumstances.

Top temperature
Ways to get to top temperature from the bubble squeeze vary, but as fast as possible risks bubbles due to excessive softening the surface, over firing due to the controller not shutting off quickly enough, and a lack of control of the surface texture.  Twice the initial rate of advance is quick enough, but still allowing the controller to shut off when the top temperature is being reached.

The s
oak at top temperature does not need to be more than 10 minutes.  If you can achieve the desired results in less that time, you should consider reducing your top temperature.

Annealing cool
A s
oak at the bottom end of the annealing range will reduce the anneal cooling time.  The lower temperature of the annealing range is about 40C below the annealing point, so to be safe the annealing soak can be set to be 30C below the annealing temperature.  This reduces the range of temperature over which the slow anneal cool takes place. 

The initial anneal cool should be to 55C below the soak, the second stage of the anneal cool to 110C below the soak can be at twice the initial anneal cool rate.  The rate of cool can be increased to 370C, where for pieces of 9mm or less, the kiln can be turned off.


However, you need to think carefully about firing quickly.  When realistically will you be able or actually need to take the piece out of the kiln?  If it is the next day or after work, then a slower firing reduces the risks of rapid firing and still enables you to take the piece out when needed.

Wednesday 13 May 2015

Frit Making

Start with clean cullet. Rinse or wash off all the dust and felt tip marks. Spread out to dry, or put the collection in the kiln at about 200C to dry.
  

An example of clear glass cullet


It is possible to start with the dry glass, or you can heat the glass to a temperature in the 300C to 450C range in a stainless steel container.  Then take the hot container with heat resistant gloves and pour the hot glass into a bucket of water (do not pour the water onto the glass, as a great deal of steam will be produced burning you).  The fractured glass can then be further broken down in size after being dried.

Smashing the glass can be done in a number of ways.  A small amount can be made in a mortar and pestle.  Larger amounts can be put between sheets of newspaper, in plastic bags or any other container that will keep the glass from shooting all over.  Hit the glass package with a hammer multiple times.

You can build a frit maker from pipes with end caps.  Fit one pipe inside the other with the glass between the ends and pound the glass between the two surfaces.  There are a number of variations on this method of production.

An example of  a commercially available frit maker


Large scale frit production can use coffee grinders, or adapted waste disposal units. Waste disposal units tend to produce a lot of frit of the same size, while coffee grinders with blades produce frit sizes related to the time the glass is ground.

Example of a suitable coffee grinder

Example of a garbage disposal unit


When you have created a pile of frit, sieve it into various sizes with screens.  It is best to discard the fine frit and powder, as they contain contaminants that are difficult to clean out and will discolour the finished product.

Example of a commercially available set of seives


You also need to ensure the metal is removed from the glass by using a strong magnet.  Fridge magnets will not do.  Put the magnet in a plastic bag and run it over the frit several times.  When finished take the bagged magnet to the waste bin and remove the magnet.  The metal will fall into the bin.

Example of  a pair of strong magnets


It is a good idea to rinse the remaining frit to remove dusts and ensure the frit is clean.  Again you can put the frit on a metal tray in the kiln to dry.  Put the frit into a closed container to keep it clean until needed for use.

Wednesday 6 May 2015

Fibre Board Moulds

There are a lot of moulds available in a variety of shapes and sizes through various suppliers.  But sometimes you want a simple or special shape that is not available to buy.  Fibre boards provide you with the material to make your own special moulds without great expense.

The ceramic fibre boards tend to come in a variety of thicknesses, mostly about 1 metre square.  Boards in 10, 15 and 25 mm thicknesses are commonly available. 


You should work in a well-ventilated area using a dust mask to avoid inhaling the dust and fibres.  See Gregorie's Glass for information on safety.

You can cut a wide variety of shapes into fibre board with just a craft knife.  You can smooth the shapes with just sandpaper. The shape can be smoothed with sandpapers in both natural and hardened states.  If a lot of material is taken off hardened shapes, it is advisable to coat that area with hardener and cure it again to ensure maximum durability.

A question that will arise is whether to harden or not.  This depends on the durability you require.  A board that is not hardened does not require kiln wash when fired.  However, as it is soft it is easy to break.  A hardened fibre board mould always requires kiln wash or other separator.  It does become durable and almost rings when tapped once it is hardened and cured.  If the shape needs to be preserved for further use, hardening is advisable.

It is also possible to stack the boards to make deeper forms.  The boards should be stacked and pined together with copper of high temperature wire such as kanthal to keep them from moving both while shaping and in use.


Fibre boards are relatively inexpensive, in comparison with commercial moulds.  They are not as durable as some, but provide a means of obtaining special shapes unique to your work.

Wednesday 29 April 2015

Large Bubbles

cambridgecreativenetwork.co.uk
Some times you want large bubbles, but when you don't, you need to know about the causes of, and ways to prevent, bubbles.

Causes and prevention of most large bubbles relate to volume control, layup, rate of advance and top temperature.

Volume control. We all know that glass tends toward being 6-7mm thick at full fuse temperatures. Any less volume and the glass thickens at the edges, so trapping air under the glass which will push up and through given enough time and temperature.

Layup. The lack of volume control is compounded by layups which do not allow the air to escape from under the edges of the piece.

Rate of advance. These two problems are compounded by asap, or even just rapid, increases in temperature. The glass softens quickly and the air finds it easier to push the glass up than to escape from under the edges. Slowing down is part of the answer.

Top temperature. A high top temperature softens the glass to the extent that any lack in volume control, layups that have hollows or traps for air, and rapid increases in temperature all allow the expanding air (and there will always be some) underneath the glass to push up and often through the glass.

These factors reinforce the Low and Slow mantra.

Other factors can promote bubbles, although the ones above are the most common. Debris between the glass and the shelf, or between glass layers can cause bubbles, given the right conditions. Small shallow indentations in the shelf can be the source of bubbles from underneath the glass. This can be identified by observing where the bubbles occur in relation to the shelf.

There are some things that can be done to reduce the likelihood of bubbles:


Wednesday 15 April 2015

Dams for Melts

There are a number of commercial moulds, dams and rings to contain pot and screen melts.

You can, of course, make your own. A simple one is to use 10 or 15 mm fibre board to contain your pot or screen melts. Cut the size and shape of hole you want into the board and that will contain the glass.


You can place this directly onto the kiln washed shelf. No fibre paper is absolutely required unless you want to. You can weight the board by placing the supports for the screen or post directly onto the board.


If you want to use the board more than once, you need to harden it with colloidal silica and fire it. Then you always need to put a separator on it at each firing to ensure it does not stick to the glass melt.


This process allows you to make custom shapes and sizes without great expense. With a bit of ingenuity, you can provide your own textured bottom to the melt.


Wednesday 8 April 2015

Safe Cooling Speeds


Almost everywhere you read that you should not open your kiln to cool it. But we know that the kiln cools progressively slower as it nears room temperatures. So how do we safely cool the kiln at rates the glass can cope with.

ww.poolspanews.com

Some advocate directing a fan at the closed kiln on the grounds that air movement will cool the kiln faster than still air will. Yes, but at a negligible rate due to the insulation properties of the the kiln.

It is much safer to program a sensible cooling rate all the way to room temperature from 370C. This allows you to open any viewing ports knowing that any rapid cooling will be counteracted by the controller switching on the heat. Upon hearing that power input, you can close the ports partially until the kiln cools a bit more.

www.woodstove-fireplaceglass.com

At lower temperatures, you can open the lid or door. The controller will operate as before warning you of too rapid cooling, so you can reduce the opening until more air is required.

Wednesday 1 April 2015

Clay Moulds

Making your own clay moulds is not as difficult as often imagined. You do need to have access to a kiln that can fire to bisque temperatures, as they are above the usual limitations of glass kilns.

There are a variety of clays you can use – paper clay, school clay or any cheap clay from a ceramics supplier. Make sure any “clay” you buy from craft shops is in fact ceramic clay and not one of the no-fire or oven fire “clays”.

The method for slab moulds is fairly simple. You need to roll out a sheet of even thickness. To do this there are a few items required.
  • Board to support the rolling of the clay
  • Rolling pin of sufficient length
  • Cloth for the bottom of the clay
  • Battens of 8-10 mm thick

cdn.instructables.com

Place the smoothed cloth on the board.
Place or fix the battens to the width needed.
Put the clay onto the cloth and work it out to the approximate thickness you require by hand.

Use the rolling pin to complete the process by pushing the clay in front of the rotating pin to get an even thickness. This will require a number of passes, both away from and toward you. You can patch any shallow places by simply putting a small piece of clay there and going over it with the rolling pin.

At this point you can impress any design you like on the wet clay, or you can incise the leather-hard clay later.

www.amaco.com


If you are shaping the clay, you can use a variety of materials to hold the clay in the shape you want. You can use another form to support the whole of the clay if desired.

bluewillowstudio.net


Set the clay aside to dry, ideally where air can get to all sides/surfaces. The clay will shrink during this drying process. It will take longer to dry if the clay can dry from only one surface, and it is more likely to crack. So if only one surface can be exposed to the air, you should cover the whole piece with a damp cloth to slow the evaporation from the top surface.

When the clay is leather hard, you can sand or mark the clay. Then have the clay fired to bisque temperatures. When you get the fired form back, you should sand any roughness away, as this will be the bottom surface of your completed piece.


It is important that you kiln wash or provide other separators between the mould and the glass, as the clay and glass will stick together. Because the clay and glass expand and contract at different rates, the glass will be broken or crazed by the ceramic.

Wednesday 25 March 2015

Straight Edges on Thick Pieces

As glass tends towards 7mm at full fuse, it is difficult to keep straight edges on thick pieces as the glass moves. If you want straight edges without dams, there are a few solutions:

1) Don't flat-fuse - apply less heat work so that the stack stays vertical instead of spreading. The degree of tack fuse required will be a subject of observation and experimentation.

cdn.supadupa.me

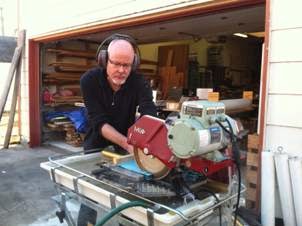
2) Plan on trimming the edges straight. You can use a saw or grinder and then either cold work the edges to polish, or fire polish.

fusedglass.org


3) Add a couple of centimetres or so on each side of your base glass, so that a 20x20cm piece becomes 24x24cm, and flat-fuse as normal. The volume change will (mostly) be absorbed by the extra glass, so that you can simply trim it back to the right size and cold work the cut edges.


artgroupsdfw.com